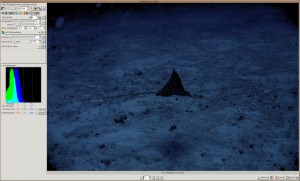
Today, we will look into how to make good dive photos. We will most look into getting the colors right. The focus being on how to use ufraw to get the white balance right. For how to choose your UW Photo Equipment and for shooting techniques, check out the excellent guides by Scott Gietler.
Introduction
When taking photos while diving, all the photos turn out blue, rather unpleasingly blue. This is because water filters out red, followed by orange and yellow (yellow is a combination of red and green when talking about light). To get accurate colors back, we want to compensate for this color loss like the human eye does. Unlike the photo camera which captures the colors as is, the human eye adapts to the colors and performs its own sort of white balance. This is similar to putting on glasses with a blue teint. After some while, the eye will have compensated for the fact that the glasses are bluish and white surfaces will be perceived as white. To solve this problem, there are multiple approaches. Each approach has its strengths and weaknesses. For best results you may want to go for a combination thereof.
Postprocessing with ufraw
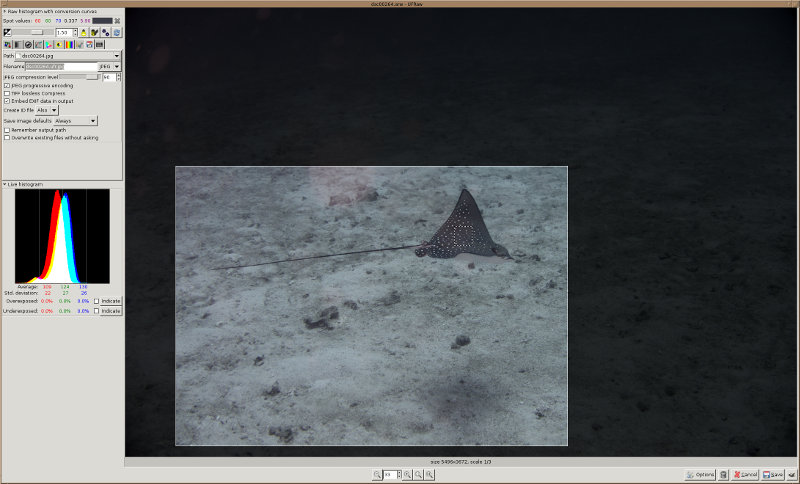
One approach is to shoot photos as raw and perform correct the color balance afterwards, for instance, with ufraw. Start up ufraw with the raw image file as parameter and follow the steps below: ![]() Select the white balance tab. This is the one to the very left below the Exposure Compensation slider. Typically this one is selected by default.
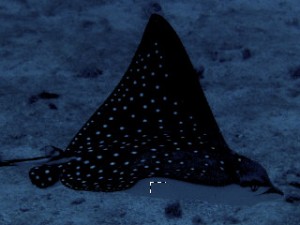
Select the white balance tab. This is the one to the very left below the Exposure Compensation slider. Typically this one is selected by default.  Get the white balance right. First try to find a spot that should have a light neutral color (white or gray). If black spots are part of same spot, that’s no problem because it does not change the color balance. If you cannot find such spot, you can try to look for sand which is relatively neutral. Preferably that spot is at the same distance as the object whose colors you want to get right. In my sample image, the spot is belly of the eagle-ray itself. Once you have located such a spot select it with the cursor. You should see the average color of the spot you have selected in the spot value line in the top left. Next select the icon next to the Temperature/Green sliders which looks like a color picker. This adjusts the white balance such that the value you have chosen turns into a neutral color.
 ![]() Objects farther away will look more blue, and objects closer to the camera will look more reddish after fixing the balance. Try locating different spots farther away and closer to the camera to play around with this effect to find the right balance. In case you cannot find a neutral spot, try to select Auto WB in the drop down box above the Temperature slider. This sometimes works very well, especially for subjects taken with flash that are close to the camera. In case neither of the above approaches produced a useful result you have to do things manually. For this you can use the Chan. multipliers or the Temperature/Green sliders. The Temperature/Green sliders, I have not gotten yet the hang of it, if you did, please leave a comment. As for the Chan. multipliers, these refer to the channels red, green and blue. ufraw normalizes them such that the lowest value of the three is always 1. Now if the image is to red/green/blue, reduce the respective multiplier. If it is too yellowish reduce red and green (yellow=red+green) or increase blue. Remember cyan=green+blue, magenta=blue+red. If you cannot find a pleasing result with the above approach, try duplicating the Chan. multipliers from another image in a similar depth at a similar distance, they should typically work too. If you have troubles because there are subjects near and far, try to get the closer ones right and let the ones farther in the back fade into blue. This looks more natural in my opinion because most people perceive colors under water with a sleight blue teint anyway. If you are unsure, just choose what you like best. Different people underwater perceive the colors slightly different. Even different cameras would balance the same picture slightly differently, so there is not just one right set of values. Getting the exposure right. Now we have hopefully a somewhat nice picture. Next get the exposure right, by changing the individual color channels you may have at the same time changed the exposure of the image. Click the auto-exposure icon (the wheels) next to the Exposure slider (next to the +/- icon). This serves as a starting point, next use the slider to adjust the image to your liking. If you have a negative exposure correction, you can play with the lamp icon, if a positive with the icon next to that, for details refer to the ufraw user’s guide which explains them far better than I could do.
Objects farther away will look more blue, and objects closer to the camera will look more reddish after fixing the balance. Try locating different spots farther away and closer to the camera to play around with this effect to find the right balance. In case you cannot find a neutral spot, try to select Auto WB in the drop down box above the Temperature slider. This sometimes works very well, especially for subjects taken with flash that are close to the camera. In case neither of the above approaches produced a useful result you have to do things manually. For this you can use the Chan. multipliers or the Temperature/Green sliders. The Temperature/Green sliders, I have not gotten yet the hang of it, if you did, please leave a comment. As for the Chan. multipliers, these refer to the channels red, green and blue. ufraw normalizes them such that the lowest value of the three is always 1. Now if the image is to red/green/blue, reduce the respective multiplier. If it is too yellowish reduce red and green (yellow=red+green) or increase blue. Remember cyan=green+blue, magenta=blue+red. If you cannot find a pleasing result with the above approach, try duplicating the Chan. multipliers from another image in a similar depth at a similar distance, they should typically work too. If you have troubles because there are subjects near and far, try to get the closer ones right and let the ones farther in the back fade into blue. This looks more natural in my opinion because most people perceive colors under water with a sleight blue teint anyway. If you are unsure, just choose what you like best. Different people underwater perceive the colors slightly different. Even different cameras would balance the same picture slightly differently, so there is not just one right set of values. Getting the exposure right. Now we have hopefully a somewhat nice picture. Next get the exposure right, by changing the individual color channels you may have at the same time changed the exposure of the image. Click the auto-exposure icon (the wheels) next to the Exposure slider (next to the +/- icon). This serves as a starting point, next use the slider to adjust the image to your liking. If you have a negative exposure correction, you can play with the lamp icon, if a positive with the icon next to that, for details refer to the ufraw user’s guide which explains them far better than I could do. ![]() Lens Distortions. There is a tab to fix that. Unfortunately, my camera model is not supported, so I can only point to it, but you have to figure out how to use it yourself. If you have any advise, please let me know using the comments section below.
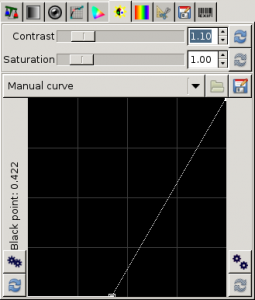
Lens Distortions. There is a tab to fix that. Unfortunately, my camera model is not supported, so I can only point to it, but you have to figure out how to use it yourself. If you have any advise, please let me know using the comments section below.  Correcting Luminosity. Sometimes the colors are too strong or look artificial, in this case, you can save the pciture by reducing the Saturation in the Correct luminosity, saturation tab. You can also play with the auto curve options to the left and right. The left one I find helpful, the right one only rarely. Crop and rotate. This tab does what it says, you certainly figure that out. Small note, if you did not apply any lens distortion fixes, you may want to crop away the edges of the pictures to get rid of lens distorion on photos were it matters. These edge distortions manifest themselves as blackish shadows in the corners. Many (especially cheaper) cameras have these lens distortion. On photos with corals, they are barely noticeable with my camera. On shots into the ocean, however, they are quite evident.
Save. Yes there is tab for that too. The only thing I suggest is to also create the ID file by selecting in the Create ID file drop down box at Also. That way ufraw stores the values you have used in an xml file in case you want to change the photo later again using your current values as a starting point. One word of caution. In the photos, there is not a lot of red, this has mostly been “consumed” by the water. So the above simply tries to compensate for that by cranking up the little red that there is, also amplifying the noise in the red channel. Depending on how deep you are and how far the subject is away, red may be simply lost and there may be no way of bringing it back other than making the entire photo look reddish. The only way around this, is to bring a strong(er) strobe with you or to use a red filter, see below.
Better White Balance
For doing the white balance it can be helpful to take a white card along with you for the next dive. This can simplify finding the right white balance afterwards. The idea is to take a shot of the white card once in a while and in the post processing step use the color generated for that card as the neutral color. However, do not expect miracles from the white card. The reason is that typically the photo you take of the white card will be relatively close to the camera, hence that way you only compensate for the color the light looses from the surface to the card. However, if the subject you shoot is five meters away from you, you would have to compensate for surface to subject, plus subject to your camera which typically is more. Another option is to take the tank of a fellow diver, however, this did not work so well for me in the past. Probably the best approach is to put a white sticker onto your buddies tank. If you are lucky, there is already one for the Nitrox data.
Red Filter
The red filter simply filter’s out green and blue to make the picture appear more reddish. This is cheap way way to fix the photos. By filtering out blue and green, all the colors get filtered out equally much and the camera will simply expose the picture longer to boost all color channels up again. As simple as it may sound, still the water will absorb different amopunts of red at different leves, so you should decide before going which red filter to use based on the expected average depth of the dive.
Bring a Powerful Strobe
This is the most effective solution. If there is no light at your depth, bring your own. However, it makes your equipment bulky, expensive, and may rob some of the fun you have while diving. Also, if the subject to shoot is 10m away from the camera, the light still has to travel 10m to the subject and again 10m back from the subject to the camera.
In Camera UW Processing
If you don’t want to deal with any of the above, use the camera’s underwater photography mode. Generally speaking, this mode will boost red and green color channels (in comparison to shots taken above water) and increase the camera’s ISO sensitivity to compensate for the generally darker light under water. While this approach is the easiest, it only goes to a certain level. Mostly close up shots up to one meter taken with flash. Under these circumstances the color balance can be fixed relatively easily. It gets tougher when we want to take pictures of subjects farther away where more red (and yellow) light will be absorbed by the water and the camera is unable to identify how much red to compensate for.
Conclusions
You should now have a good understanding of how to fix the colors in your pictures and have a bsic understanding why for some pictures you can only aim for a good compromise of color balance.

